
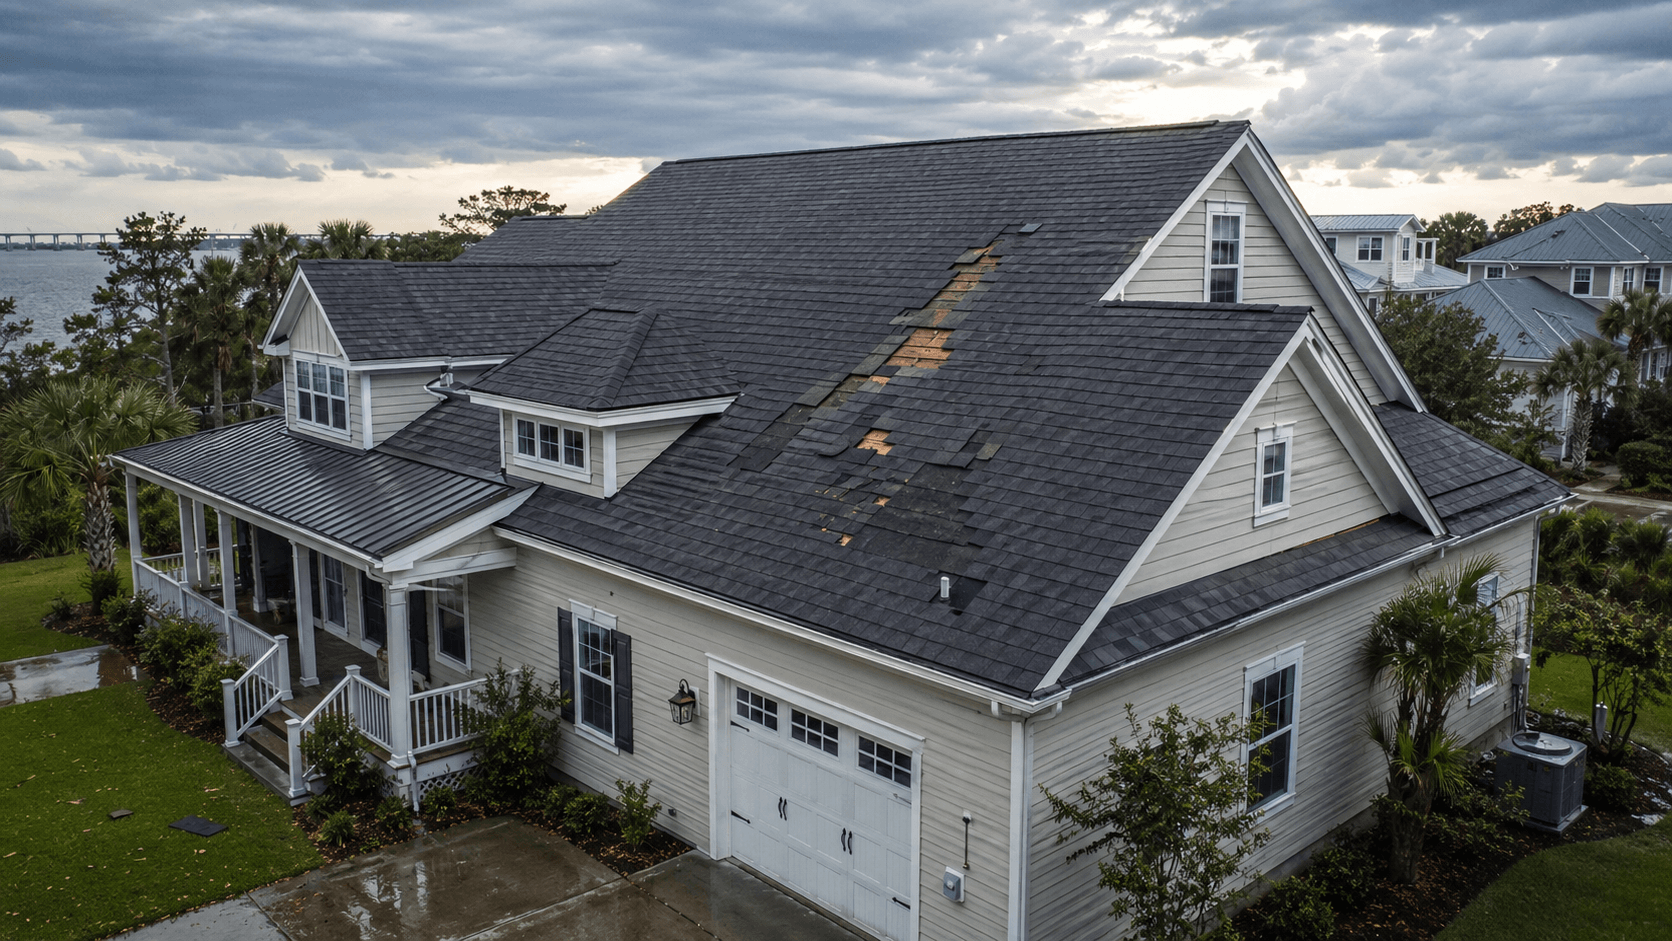
MasterRoof Mount Pleasant helps homeowners in Mount Pleasant, SC, identify and correct wind-damaged roofing before the next coastal downpour turns a small opening into extensive water damage. If shingles are missing, lifted, creased, or loose after high winds, we recommend treating the condition as an active vulnerability—even when the ceiling is still dry.
A shingle roof does not need a large visible hole to leak. Removing one shingle can expose fasteners, seams, and the less weather-resistant components beneath the roof covering. Wind-driven rain can then travel sideways or uphill under neighboring shingles, reaching roof decking, attic insulation, framing, and interior finishes far from the visible damage.
Why High-Wind Roof Damage Is a Serious Mount Pleasant Risk
Mount Pleasant homes can experience strong thunderstorms, tropical systems, tornado-producing rain bands, and gusty coastal weather. These events combine uplift pressure with wind-driven rain and airborne debris. The result may be shingle damage on several roof slopes, even when the storm never produces hurricane-force sustained winds.
Research from the Insurance Institute for Business & Home Safety indicates that storm winds as low as 50 mph can damage a home in ways that allow water inside. Older shingles, weakened adhesive strips, incorrect nail placement, exposed roof edges, and previous repairs can reduce the wind speed required to cause failure.
Local storm history also demonstrates how concentrated the damage can be. The National Weather Service’s report on Hurricane Idalia’s Mount Pleasant impacts documents an outer-band tornado that caused roof and tree damage near Whitehall Terrace before moving through areas around Wando High School, Carolina Park, and Park West. This type of event can damage one group of homes while leaving nearby properties with few obvious signs.
Why Even a Few Missing Shingles Can Cause a Major Leak
Asphalt shingles work as an overlapping water-shedding system. Each course covers the fasteners and upper portion of the course below it. When wind removes a shingle, it interrupts that overlap and may expose three vulnerable areas:
- Nail heads or nail holes that provide direct water-entry points
- The upper edge or joint of the shingle course below
- Underlayment that was designed as secondary protection rather than a permanent exterior surface
Underlayment can delay water intrusion, but it should not be treated as a finished waterproof roof. It may contain fastener penetrations, seams, wrinkles, installation cuts, or weathered areas. Sunlight and repeated wetting can also weaken exposed material.
Coastal rain makes the problem more urgent. Strong wind pushes water beneath adjacent shingles and across normally protected seams. Once water reaches the roof deck, it can follow nails, rafters, trusses, wiring, or framing before becoming visible indoors. The first ceiling stain may therefore appear several feet from the missing shingle.
The Wind-Damage Patterns Homeowners Should Recognize
Completely Missing Shingles
A missing shingle usually creates a dark, unusually flat, or differently colored rectangular area. Depending on the roof assembly, homeowners may see black or synthetic underlayment, exposed nail heads, or the upper portion of the shingle below.
Look for shingles in the yard, gutters, driveway, landscaping, or neighboring property. A recovered shingle may show whether nails tore through its mat, the seal strip failed, or part of the shingle fractured.
Lifted or Unsealed Shingles
A shingle does not have to blow away to fail. Wind can break its adhesive bond and leave the tab slightly raised. From the ground, affected shingles may appear uneven, cast narrow shadows, flutter during gusts, or sit above the surrounding roof surface.
Once the seal is broken, later gusts can repeatedly bend the shingle. Rain can also enter beneath it before complete detachment occurs.
Creased Shingles
A crease commonly forms when wind folds a shingle upward and it falls back into place. The roof may look intact from the yard, but the shingle’s fiberglass reinforcement can be fractured along the fold line.
Creased shingles should generally be replaced rather than pressed down and sealed. Their structural strength has been reduced, and another wind event can tear them along the crease.
Loose Ridge and Hip Caps
Ridge caps cover the highest horizontal line of a roof, while hip caps protect angled intersections between roof planes. These components receive direct wind exposure and protect joints where water entry can become extensive.
Signs of ridge-cap damage include missing cap sections, raised corners, uneven cap lines, exposed ridge-vent material, displaced nails, or pieces of cap shingles on the ground. A gap at the ridge can admit wind-driven rain into both sides of the roof system.
Exposed or Damaged Underlayment
Visible underlayment indicates that the primary roof covering has already failed. Tears, punctures, open seams, or areas pulled away from fasteners increase the urgency.
Water can enter through an opening too small to identify from the ground. Exposed underlayment should therefore be professionally covered and repaired before another rain event.
Debris-Impact Damage
Branches, pine cones, loose outdoor objects, and windborne construction debris can puncture or fracture shingles. A branch does not need to remain on the roof to cause damage.
We look for split shingles, circular impact marks, localized granule loss, cracked flashing, bent gutters, punctured underlayment, and soft or damaged decking. Tree limbs can also scrape protective granules from several shingles as they move in the wind.
Immediate High-Wind Roof Damage Checklist
1. Confirm That the Storm Has Passed
Do not begin an exterior inspection while lightning, strong gusts, or falling limbs remain possible. Stay away from downed electrical lines, leaning trees, damaged utility equipment, and standing water near electrical sources.
2. Keep Everyone Off the Roof
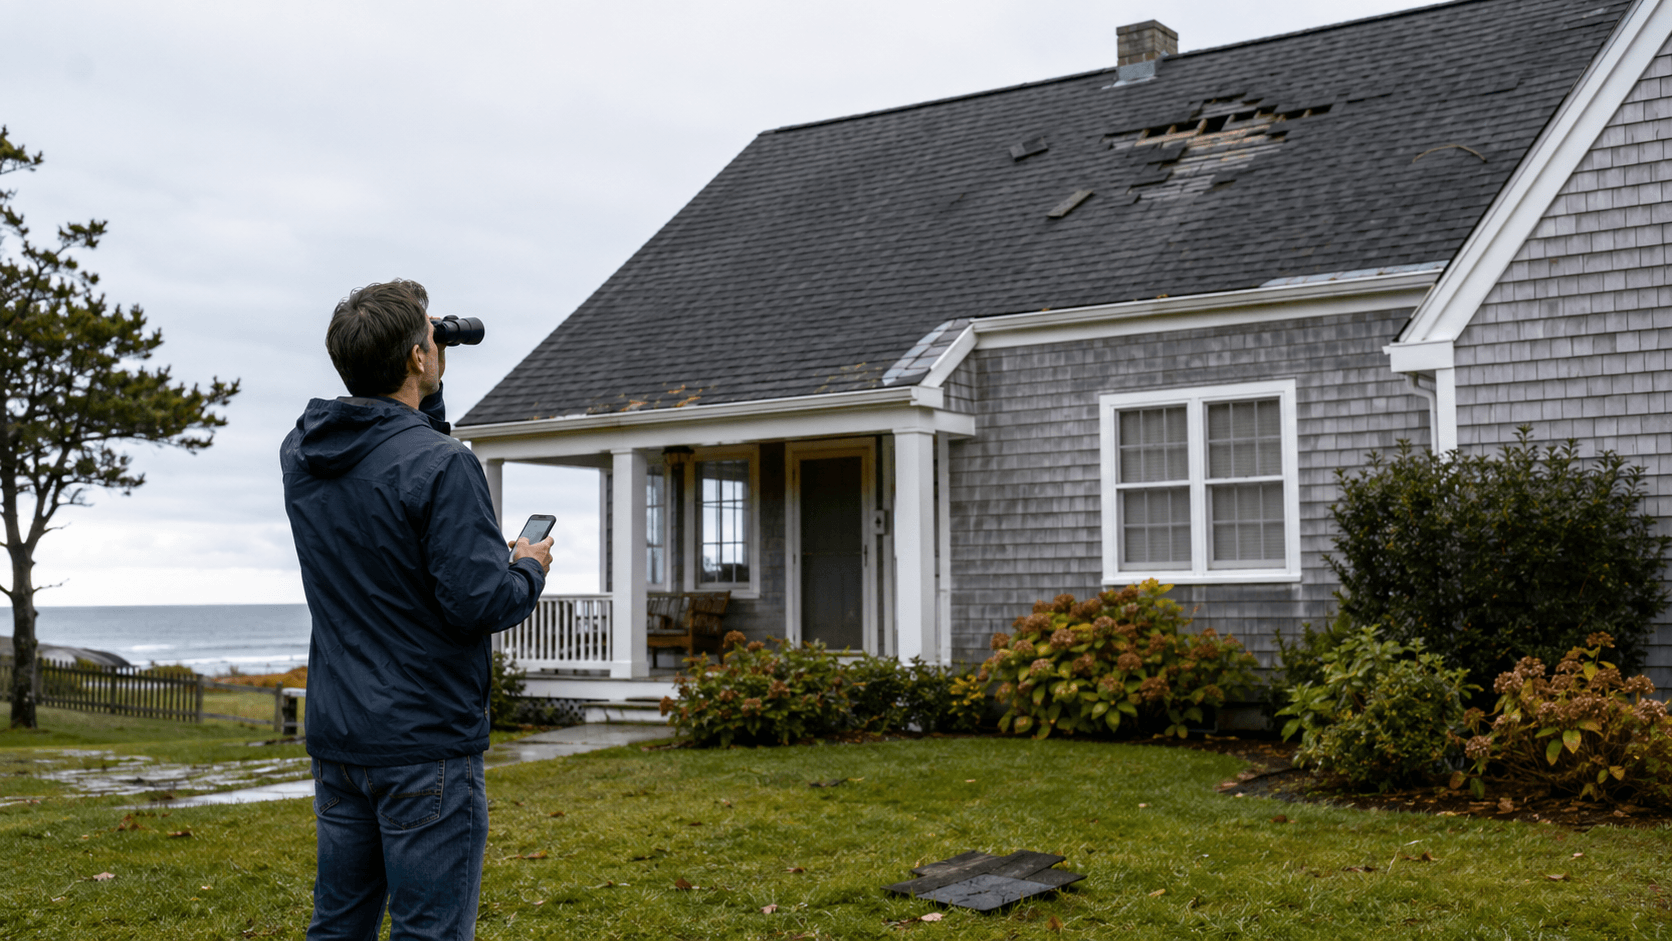
A wet or wind-damaged roof can be extremely slippery. Lifted shingles may tear beneath a person’s weight, and damaged decking may not be visible from above. Walking on the roof can also disturb evidence needed for an insurance inspection.
Use binoculars, a camera with zoom, or clear photographs taken from the ground. Do not lean a ladder against loose gutters or climb onto a steep roof to retrieve shingles.
3. Walk the Property From a Safe Distance
Inspect every visible roof slope rather than concentrating only on the side facing the prevailing wind. Turbulence can create suction along leeward slopes, ridges, corners, dormers, and roof-to-wall intersections.
Check for:
- Dark rectangular areas where shingles are missing
- Tabs that appear raised, crooked, or out of alignment
- Gaps along ridges and hips
- Exposed underlayment or fasteners
- Shingle pieces in the yard or gutters
- Bent flashing near chimneys, vents, and walls
- Broken or hanging gutters and downspouts
- Branches resting on the roof
- Damaged soffit, fascia, siding, or roof vents
- Granules accumulating at downspout outlets
Photograph each elevation and include wide views showing the location of the damage.
4. Inspect the Attic Without Delaying for a Ceiling Stain
If the attic is safely accessible, inspect it during or shortly after rain. Use a flashlight instead of relying only on attic lighting.
Look for wet decking, darkened wood, droplets on nails, damp rafters, compressed insulation, water tracks, musty odors, or daylight entering through the roof. Pay particular attention beneath ridges, valleys, penetrations, and the roof slope where exterior damage was observed.
Do not touch wet wiring or step between attic joists. If insulation is wet, mark the general area from a safe platform and leave removal to qualified professionals.
5. Check Interior Rooms on Every Level
Water may travel along framing before appearing below the damaged roof section. Inspect ceilings, exterior walls, window headers, closets, attic access panels, recessed lights, and rooms beneath roof valleys.
Early warning signs include:
- Pale yellow or brown ceiling discoloration
- Soft drywall or bubbling paint
- Damp trim or wall surfaces
- Water around light fixtures
- Peeling tape at drywall seams
- New musty odors
- Dripping sounds inside walls
If water appears near electrical fixtures, avoid the area and contact the appropriate emergency professional.
What to Do If Water Is Already Entering the Home
Move furniture, electronics, rugs, and valuables away from the affected area. Place a stable container beneath active drips and use towels or plastic sheeting to protect flooring.
A swollen ceiling can hold a significant amount of water and may collapse without warning. Keep people and pets away from sagging drywall. Do not puncture the ceiling if water is near electricity or if the ceiling’s stability is uncertain.
Record the affected room before moving or discarding damaged property. Photograph water entry, stained finishes, wet belongings, and temporary protective measures. Save receipts for reasonable emergency mitigation.
Should Homeowners Install Their Own Emergency Roof Tarp?
Emergency covering may prevent additional damage, but installing it requires roof access during hazardous conditions. A tarp that is too small, loosely attached, or fastened through the wrong areas can detach, channel water beneath the roof covering, or create additional holes.
Plastic placed inside the attic may redirect dripping water temporarily, but it does not stop the roof assembly from becoming wet. It can also trap moisture against wood or insulation.
We recommend professional temporary protection when the roof has exposed underlayment, multiple missing shingles, damaged ridge caps, punctures, or active water entry. A proper emergency measure should extend beyond the damaged area, resist wind uplift, and avoid interfering with the permanent repair.

Documenting Missing Shingles for an Insurance Claim
Create a storm record while details are fresh. Include the date and approximate time of the event, when the damage was discovered, when water first appeared, and what emergency measures were taken.
Useful documentation includes:
- Wide photographs of all roof elevations
- Close photographs taken safely from the ground
- Images of shingles or debris found on the property
- Interior and attic moisture damage
- Damaged gutters, siding, fences, or trees
- Weather alerts or storm notifications
- Inspection reports and repair estimates
- Receipts for temporary protection and cleanup
Do not discard loose roofing material until the contractor or insurer confirms that it is no longer needed. Avoid describing every storm-related condition as “old damage” or “normal wear” before a professional evaluates it. The cause, extent, and repairability should be established through inspection.
What a Professional Wind-Damage Roof Inspection Should Cover
A thorough inspection should evaluate the complete roof system rather than count only the visibly missing shingles. The contractor should examine:
- Every roof slope for missing, lifted, creased, or fractured shingles
- Perimeter courses, starter strips, rakes, and eaves
- Ridge and hip caps
- Valleys and roof-to-wall transitions
- Step flashing, counterflashing, and chimney flashing
- Plumbing boots, exhaust vents, skylights, and ridge vents
- Underlayment visible through damaged areas
- Gutters, drip edge, fascia, and soffit
- Roof decking for moisture or impact damage
- Attic framing, insulation, and ventilation
- Previous repairs that may have failed during the storm
This inspection determines whether the damage is isolated or part of a broader wind-uplift pattern. It also identifies entry points that may not align with the visible interior leak.
How Missing Shingles Should Be Repaired
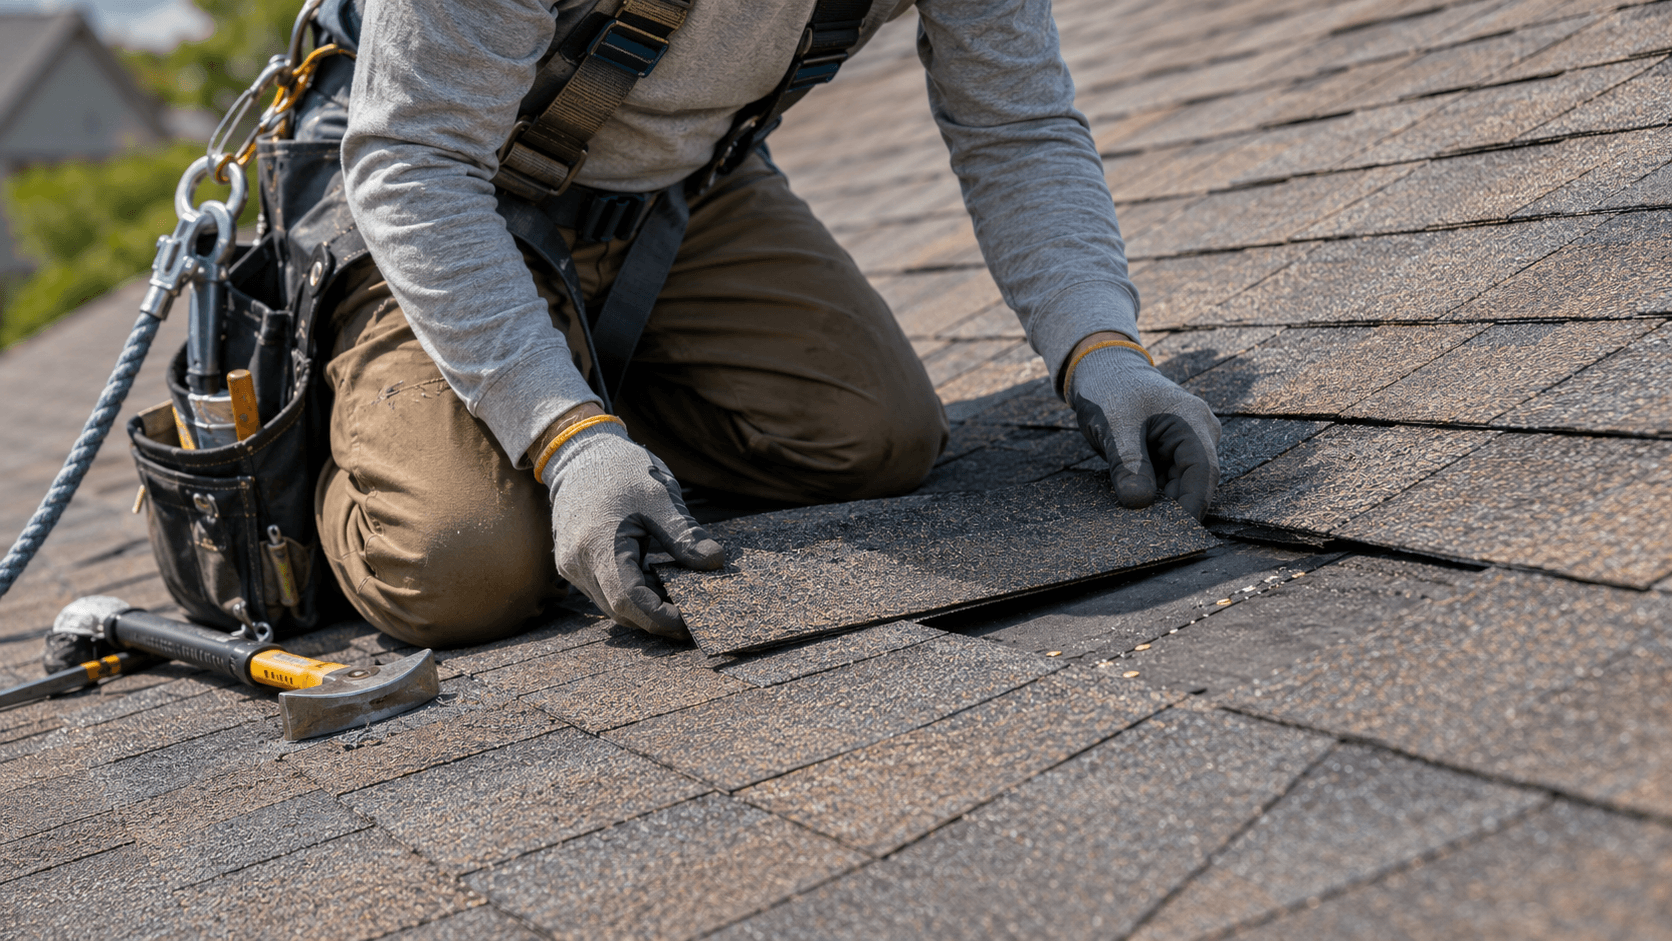
A durable repair requires more than sliding a replacement shingle into the opening. The damaged area must be opened carefully so the contractor can inspect the underlayment, decking, fastener pattern, and surrounding shingles.
A proper repair may include:
- Removing torn, creased, loose, or punctured shingles
- Inspecting the deck for swelling, softness, delamination, or rot
- Replacing damaged roof decking where necessary
- Repairing torn or open underlayment
- Installing compatible shingles with correct exposure and alignment
- Placing fasteners in the manufacturer’s designated nailing zone
- Sealing replacement shingles when temperature or roof conditions prevent immediate thermal bonding
- Repairing adjacent flashing, ridge caps, or vents
- Confirming that water can drain without entering repaired seams
Homeowners who need to repair missing shingles in Mount Pleasant should arrange an inspection before repeated rainfall expands the damaged area.
Can Only the Missing Shingles Be Replaced?
Localized replacement may be appropriate when damage is limited, the surrounding roof remains serviceable, compatible shingles are available, and the underlayment and decking are intact.
A larger repair or roof replacement may be necessary when:
- Missing shingles appear on several slopes
- Many remaining shingles are lifted or creased
- Nails have pulled through widespread areas
- The roof covering is brittle or near the end of its service life
- Shingles cannot be lifted without cracking
- Matching materials are unavailable
- Underlayment or decking has extensive water damage
- Previous repairs have created recurring leaks
- Ridge, valley, and flashing failures occur together
The repair scope should address the full wind-damaged area, not simply restore the roof’s appearance from the street.
Preventing Shingle Loss During the Next Wind Event
Schedule roof repairs before hurricane season or the next forecast period of severe weather. Loose shingles, failed seal strips, deteriorated pipe boots, unsecured flashing, and damaged ridge caps should be corrected while conditions are dry.
Trim hazardous branches using a qualified tree professional, secure outdoor furniture and equipment, and keep gutters clear so heavy rain can drain quickly. After roof replacement, retain the shingle manufacturer, product line, color, warranty, installation date, and contractor records. This information makes future repairs faster and improves material matching.
For homes with repeated wind damage, ask whether the roof’s starter courses, perimeter attachment, deck fastening, underlayment, and ridge protection are suitable for local coastal exposure. Wind performance depends on the entire assembly, not only the rating printed on the shingle package.
Conclusion
Missing shingles after high winds should be treated as a time-sensitive roof failure because exposed fasteners, weakened seams, loose ridge caps, and damaged underlayment can admit wind-driven coastal rain before an interior stain becomes visible. We recommend keeping everyone off the roof, documenting all damage, inspecting the attic and interior, protecting belongings from active water, and arranging a complete professional inspection before the next storm expands a localized repair into damaged decking, insulation, drywall, or structural framing.
Frequently Asked Questions
How quickly should missing shingles be repaired after a windstorm?
They should be inspected and protected as soon as conditions are safe, ideally before the next rainfall. Exposed underlayment and fastener holes can begin admitting water during the first wind-driven shower, even if no leak is yet visible indoors.
Does one missing shingle mean the roof will leak?
Not every missing shingle produces an immediate visible leak, but every missing shingle compromises the roof’s intended overlap. The risk is greater when nail holes, underlayment seams, roof decking, or the upper edge of the course below are exposed.
Can lifted shingles be resealed instead of replaced?
A lifted shingle may sometimes be resealed if it remains flexible, intact, and uncreased. Shingles with fractures, permanent creases, torn nail areas, significant granule loss, or repeated uplift should be replaced because sealant cannot restore their original structural strength.